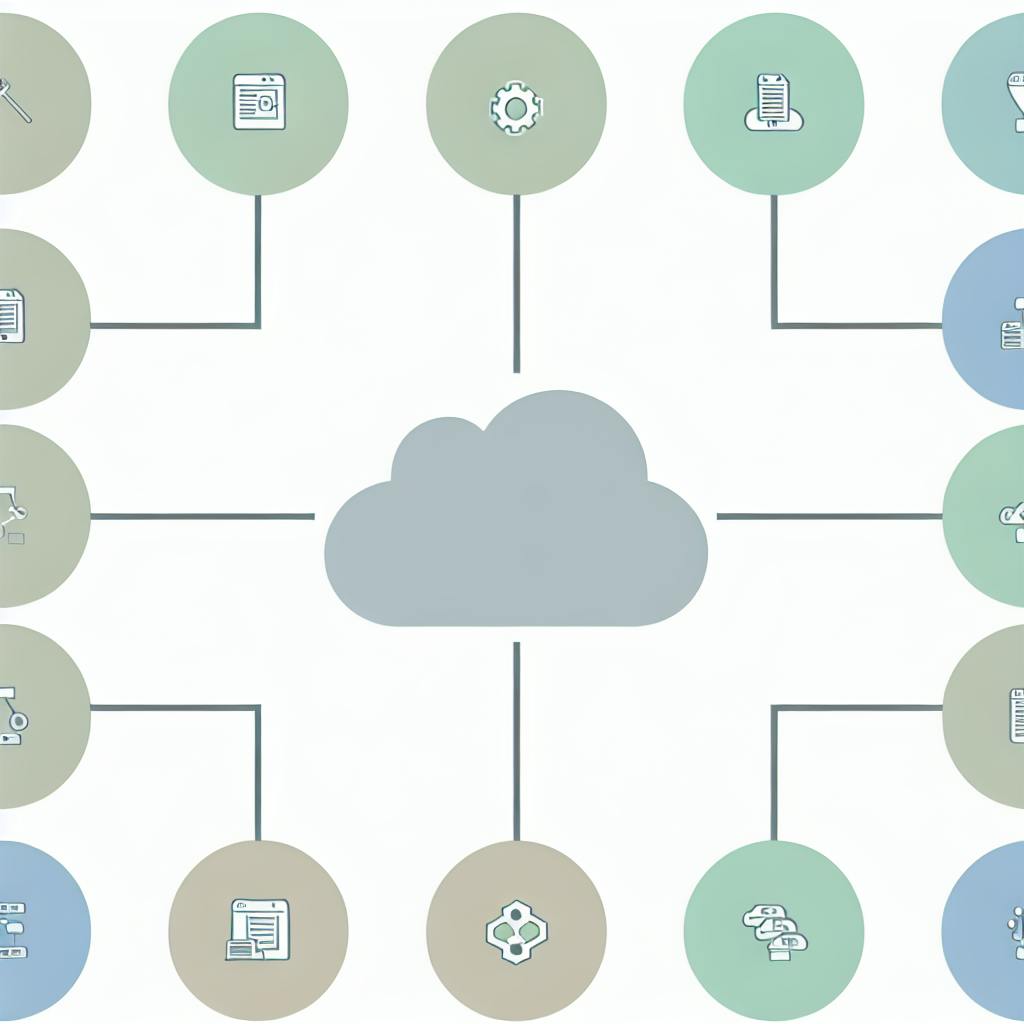
AWS Auto Scaling helps manage cloud resources automatically. Here's what you need to know:
- What it does: Adjusts resources based on demand, keeps apps running smoothly, controls costs
- Key components: Auto Scaling Groups, Launch Templates, Scaling Policies
- Setup steps:
- Create Launch Template
- Set up Auto Scaling Group
- Configure scaling rules
- Connect to load balancer (optional)
Quick comparison of scaling methods:
| Method | Use Case | How It Works |
|---|---|---|
| Target Tracking | Maintain specific metric | Adjusts to keep metric at target |
| Simple Scaling | Basic threshold-based | Adds/removes instances when metric crosses threshold |
| Step Scaling | Gradual changes | Uses multiple thresholds for fine-tuned scaling |
| Predictive | Varying workloads | Uses ML to forecast demand |
| Scheduled | Known busy times | Changes capacity at set times |
Key tips:
- Choose the right metrics and thresholds
- Use multiple Availability Zones for reliability
- Consider Spot Instances to reduce costs
- Implement proper security measures
- Monitor and optimize regularly
Related video from YouTube
AWS Auto Scaling basics

Key terms and ideas
AWS Auto Scaling helps manage resources for your apps. Here are some key terms:
| Term | Meaning |
|---|---|
| Scaling | Changing the number of resources to match workloads |
| Auto Scaling Group (ASG) | A set of EC2 instances that can be scaled together |
| Launch Template | A blueprint for new EC2 instances in an ASG |
| Scaling Policy | Rules that decide when to scale an ASG |
How AWS Auto Scaling works
AWS Auto Scaling follows these steps:
- Monitoring: Tracks app workload using metrics like CPU use or request wait times
- Scaling Decision: Chooses whether to add or remove resources based on metrics
- Scaling Action: Starts or stops EC2 instances as needed
Main parts of AWS Auto Scaling
AWS Auto Scaling has three main parts:
-
Auto Scaling Group (ASG)
- Core part of AWS Auto Scaling
- A group of EC2 instances that scale together
-
Launch Template
- Sets up new EC2 instances for the ASG
- Replaces older launch configurations
-
Scaling Policies
- Decide when to scale the ASG
- Three types:
- Target Tracking Scaling: Aims for a specific metric value
- Simple Scaling: Adds or removes instances based on a threshold
- Step Scaling: Uses predefined steps to adjust instance count
Here's a breakdown of scaling policy types:
| Policy Type | How it Works |
|---|---|
| Target Tracking | Keeps a metric at a set value |
| Simple Scaling | Adds or removes instances when a metric passes a threshold |
| Step Scaling | Uses multiple thresholds to add or remove different numbers of instances |
AWS Auto Scaling is part of the AWS Auto Scaling service. You only pay for the resources you use and CloudWatch monitoring fees.
AWS Auto Scaling helps:
- Keep apps running smoothly
- Use only the resources you need
- Cut costs
- Improve reliability
It's a useful tool for managing your app resources without constant manual work.
Setting up AWS Auto Scaling
What you need before starting
Before setting up AWS Auto Scaling, make sure you have:
- An AWS account
- Basic knowledge of AWS services like EC2 and Elastic Load Balancing
- Proper permissions to manage Auto Scaling groups, launch templates, and scaling policies
Also, decide on:
| Item | Description |
|---|---|
| Instance type | The kind of EC2 instance you'll use |
| VPC and subnets | Where your instances will run |
| Instance limits | Minimum and maximum number of instances |
| Scaling rules | What triggers scaling and how it happens |
How to create an Auto Scaling group
To set up an Auto Scaling group:
- Go to the AWS Management Console and find the Auto Scaling dashboard
- Click "Create Auto Scaling group" and name your group
- Pick a launch template for your instances
- Choose your VPC and subnets
- Set your minimum and maximum instance numbers
- Set up your scaling rules
- Check everything and create your group
Setting up launch templates
Launch templates tell AWS how to set up new instances. To make one:
- Go to the EC2 dashboard and click "Launch Templates"
- Click "Create launch template" and give it a name
- Pick an Amazon Machine Image (AMI)
- Choose your instance type
- Set any other options you need
- Check everything and create your template
Connecting with Elastic Load Balancing
Elastic Load Balancing spreads traffic across your instances. To connect it to your Auto Scaling group:
- In the EC2 dashboard, click "Load Balancers"
- Click "Create Load Balancer" and pick a type
- Set up your load balancer, including VPC and subnets
- Pick the Auto Scaling group to connect
- Set any other options you need
- Check everything and create your load balancer
Tips for using AWS Auto Scaling well
Picking the right scaling measures
To use AWS Auto Scaling well, choose the right scaling measures. Pick metrics that show how busy your app is. AWS offers many metrics like:
- CPU use
- Number of requests
- Response time
Pick the ones that fit your app best. For example:
| App Type | Good Metric |
|---|---|
| Web server | Number of requests |
| Database | CPU use |
You can use more than one metric to decide when to scale.
Setting up checks and alerts
Set up checks and alerts to make sure your Auto Scaling group works well. Use health checks to find and replace broken instances. Set up alerts to tell you when scaling happens or when instances fail checks.
Use AWS tools like CloudWatch and SNS for checks and alerts. You can also use other tools to watch your Auto Scaling group and get alerts about problems.
Choosing the best instance types and sizes
Pick the right instance types and sizes to make sure your app has what it needs to run well. AWS has many types of instances, like:
- General-purpose
- Compute-focused
- Memory-focused
Think about what your app needs when you choose. For example:
| If your app needs | Choose this type |
|---|---|
| High CPU use | Compute-focused |
| Lots of memory | Memory-focused |
Using multiple zones for better uptime
Use multiple zones to keep your app running even if one zone has problems. AWS has many Availability Zones (AZs) in each region. Spread your instances across different AZs to keep your app up.
To do this with AWS Auto Scaling, just pick the AZs you want when you make your Auto Scaling group. AWS will spread your instances across them.
How to use Spot Instances to save money
Spot Instances can help you spend less on AWS. They're extra EC2 instances that AWS sells for less. AWS will stop your Spot Instances when the price goes above what you're willing to pay.
To use Spot Instances with Auto Scaling:
- When you make your Auto Scaling group, say how much you'll pay for Spot Instances
- AWS will start Spot Instances when the price is low enough
- AWS will stop them when the price gets too high
Here's why Spot Instances are good:
| Benefit | How it helps |
|---|---|
| Save money | Pay up to 90% less for EC2 |
| Use when you need | AWS starts and stops them based on price |
| Grow and shrink | Auto Scaling can add or remove Spot Instances as needed |
Advanced Auto Scaling methods
Scaling based on future needs
AWS Auto Scaling can adjust resources based on predicted future needs. This uses machine learning to forecast demand and change capacity accordingly.
This works well for apps with changing workloads. It looks at past usage to prepare for future changes, helping avoid having too few or too many resources.
To use this:
- Gather data on how your app has been used in the past
- Make a predictive scaling policy in AWS Auto Scaling
- Set up the policy to change capacity based on what it predicts
Scaling on a set schedule
You can set AWS Auto Scaling to change resources at specific times. This helps when you know when your app will be busy.
For example, if your app gets busy every morning, you can set it to add more resources then.
To do this:
- Figure out when your app gets busy
- Make a scheduled scaling policy in AWS Auto Scaling
- Set the policy to change resources at those times
Scaling to meet specific goals
Step scaling lets you change resources based on specific measures. For example, you can add more resources when CPU use gets high.
This helps you meet exact performance goals.
To use step scaling:
- Choose what to measure (like CPU use)
- Make a step scaling policy in AWS Auto Scaling
- Set the policy to change resources based on your measures
Scaling in steps
Step scaling can also change resources bit by bit, not all at once. This is good when sudden changes might cause problems.
By changing slowly, you can better match what you need without overdoing it.
To set this up:
- Decide how much to change each time
- Make a step scaling policy in AWS Auto Scaling
- Set the policy to change resources in small steps
Here's a table comparing these scaling methods:
| Scaling Method | When to Use | How It Works |
|---|---|---|
| Predictive | For changing workloads | Uses past data to guess future needs |
| Scheduled | For known busy times | Changes resources at set times |
| Step (Goal-based) | To meet specific targets | Changes based on exact measures |
| Step (Gradual) | To avoid sudden changes | Changes resources bit by bit |
Ways to keep costs down
Finding the right mix of speed and cost
To save money with AWS Auto Scaling, you need to balance speed and cost. This means picking the right EC2 instances that work well but don't cost too much.
One way to save is by using Spot Instances. These are extra EC2 instances that cost less than regular ones. You can use them when you don't need as much power.
Here's an example of how Spot Instances can save money:
| Instance Type | Number of Instances | Regular Cost (per month) | Cost with Spot Instances | Savings |
|---|---|---|---|---|
| c5.xlarge | 10 | $1,224 | $416 | 66% |
Using Reserved Instances and Savings Plans
Reserved Instances (RIs) and Savings Plans are two more ways to save money. They both give you a discount if you agree to use AWS for a certain amount of time.
| Plan Type | Discount | How it Works |
|---|---|---|
| Reserved Instances | Up to 72% | Pay for a set amount of EC2 use |
| EC2 Instance Savings Plan | Up to 72% | Like RIs, but more flexible |
| Compute Savings Plan | Up to 66% | Can use with different AWS services |
To use these plans well, you need to know how much AWS you use. This helps you pick the right plan and save the most money.
Setting rules to stop unused resources
Another way to save money is to turn off resources you're not using. You can do this by setting up rules in AWS.
For example, you can make a rule that turns off EC2 instances when they're not busy. This way, you only pay for what you use.
Here's how to set up a rule to turn off unused instances:
- Use CloudWatch to check how busy your instances are
- Make a rule that turns off instances when they're not busy
- Use Auto Scaling to turn instances on and off based on the rule
This can help you save a lot of money by not paying for resources you don't need.
Auto Scaling for different types of work
Scaling for websites
AWS Auto Scaling helps websites handle changing traffic. It adds or removes resources as needed, keeping your site running well and saving money.
Here's how to use Auto Scaling for a website:
- Make an Auto Scaling group for your website's parts
- Set up rules for when to add or remove resources
- Use CloudWatch to watch your traffic and start the scaling
This keeps your website working well, even when it's busy.
| Traffic Level | Auto Scaling Action |
|---|---|
| Low | Remove resources |
| Normal | Keep current setup |
| High | Add resources |
Scaling for batch jobs
Auto Scaling also works for batch jobs like data processing. It helps jobs finish faster and cuts costs.
To use Auto Scaling for batch jobs:
- Create an Auto Scaling group for your job's resources
- Set up rules for when to scale
- Use CloudWatch to start scaling when the job begins or ends
This helps your jobs run quickly and cheaply.
| Job Phase | Auto Scaling Action |
|---|---|
| Start | Add resources |
| Running | Adjust as needed |
| End | Remove resources |
Scaling for microservices
Auto Scaling works well for microservices too. It helps handle changing traffic for things like API requests.
To scale a microservice:
- Make an Auto Scaling group for your microservice
- Set up rules for when to scale
- Use CloudWatch to watch traffic and start scaling
This keeps your microservice working well for users.
| Traffic Level | Auto Scaling Action |
|---|---|
| Low | Scale down |
| Medium | Maintain |
| High | Scale up |
sbb-itb-6210c22
Fixing common Auto Scaling problems
Finding out why scaling isn't working
When Auto Scaling doesn't work as expected, follow these steps to find the problem:
- Check the Auto Scaling group setup
- Look at CloudWatch metrics and alarms
- Review the Auto Scaling group's activity history
| Check | What to look for |
|---|---|
| Group setup | Correct desired capacity, min/max limits, scaling rules |
| CloudWatch | Proper metric setup, alarm triggers |
| Activity history | Errors or issues blocking scaling |
Dealing with capacity issues
Capacity problems can happen when:
- Desired capacity is outside min/max limits
- Scaling doesn't happen as expected
To fix these issues:
- Change desired capacity to fit within limits
- Adjust min/max limits if needed
- Check scaling rules and CloudWatch settings
| Problem | Fix |
|---|---|
| Capacity outside limits | Adjust desired capacity |
| Scaling not working | Check rules and CloudWatch |
Fixing unhealthy instances
Unhealthy instances can stop Auto Scaling from working right. Here's how to fix them:
- Find the cause by checking logs and metrics
- Fix the problem (restart, update, or replace the instance)
- Make sure the instance is working after fixing it
| Step | Action |
|---|---|
| Find the cause | Check logs and metrics |
| Fix the problem | Restart, update, or replace |
| Confirm fix | Verify instance is working |
Keeping Auto Scaling secure
Setting up the right IAM roles and rules
To keep Auto Scaling safe, set up the right IAM roles and rules:
- Make a new IAM role for your Auto Scaling group
- Add the right policies to the IAM role
- Let the Auto Scaling service use the role
| Step | What to do |
|---|---|
| Make IAM role | Create role with needed permissions |
| Add policies | Put in managed or custom policies |
| Allow Auto Scaling | Let Auto Scaling use the role |
Making network access safe
Keep network access safe with these steps:
- Use security groups to control traffic
- Use network ACLs to add more safety
- Watch network traffic for odd things
| Step | What to do |
|---|---|
| Use security groups | Set up groups to allow only needed traffic |
| Use network ACLs | Set up ACLs to allow or block traffic |
| Watch network traffic | Use CloudWatch and CloudTrail to spot odd activity |
Protecting data in use and storage
Keep data safe when it's being used and stored:
- Use encryption to keep data secret
- Store data in safe places
- Control who can see the data
| Step | What to do |
|---|---|
| Use encryption | Use KMS to keep data secret |
| Use safe storage | Use S3 or EBS to store data |
| Control access | Use IAM roles and policies to control who sees data |
Making Auto Scaling work better
Improving scaling rules
To make Auto Scaling work better, try these tips:
- Pick good metrics to trigger scaling
- Set the right thresholds for your metrics
- Use cooldown periods to stop too-fast scaling
- Test your rules to make sure they work
| Step | What to do |
|---|---|
| Pick metrics | Choose metrics that show when to scale |
| Set thresholds | Decide when to start scaling |
| Add cooldowns | Wait between scaling actions |
| Test rules | Make sure everything works right |
Getting apps ready for scaling
To prepare your apps for scaling:
- Build apps that can grow easily
- Use load balancers to spread out traffic
- Use auto scaling groups to manage instances
- Keep an eye on your apps
| Step | What to do |
|---|---|
| Build for growth | Make apps that can handle more users |
| Spread traffic | Use load balancers to share work |
| Manage instances | Use auto scaling groups |
| Watch apps | Check that apps are working well |
Dealing with sudden traffic jumps
To handle big traffic increases:
- Use predictive scaling to get ready early
- Use dynamic scaling to respond quickly
- Spread traffic across many instances
- Keep watching your apps
| Step | What to do |
|---|---|
| Plan ahead | Use predictive scaling |
| React fast | Use dynamic scaling |
| Share the load | Use load balancers |
| Stay alert | Keep checking your apps |
Watching and understanding Auto Scaling
Using CloudWatch to track and alert

CloudWatch helps you keep an eye on your Auto Scaling. It can tell you when something needs your attention.
To set up CloudWatch alerts for Auto Scaling:
- Go to the CloudWatch console
- Click "Alarms" on the left
- Click "Create Alarm" and pick "Auto Scaling"
- Choose your Auto Scaling group and what to watch (like CPU use)
- Set when to alert you
This helps you know when to check on your app.
Making your own tracking measures
You can also make your own ways to watch Auto Scaling. This means looking at data from your instances and groups.
You could:
- See how long it takes to start or stop instances
- Check how much CPU, memory, or disk space is used
- Make charts to see Auto Scaling data easily
This helps you understand your Auto Scaling better.
Looking at scaling events to plan better
Scaling events show you when Auto Scaling adds or removes instances. By looking at these events, you can make Auto Scaling work better for you.
Types of scaling events:
| Event Type | What It Means |
|---|---|
| Scaling up/down | Instances added or removed |
| Instance start/stop | New instances start or old ones stop |
| Policy trigger | Something (like high CPU use) causes scaling |
Using Auto Scaling with other AWS tools
Auto Scaling with AWS Lambda
AWS Lambda works with Auto Scaling to handle more or fewer function calls as needed. This keeps your app working well when it's busy or quiet.
To use Auto Scaling with Lambda:
- Go to the AWS Console and find Auto Scaling
- Make a new Auto Scaling group for your Lambda function
- Set up rules for when to add or remove function instances
- Choose what to measure (like how many times the function runs)
Here's an example of scaling based on function calls:
| Function Calls | Action |
|---|---|
| Many | Add more function instances |
| Few | Remove function instances |
Auto Scaling for ECS and EKS
ECS and EKS use Auto Scaling to manage container apps. This helps your app work well when it's busy or quiet.
To use Auto Scaling with ECS or EKS:
- Go to the AWS Console and find Auto Scaling
- Make a new Auto Scaling group for your container app
- Set up rules for when to add or remove containers
- Choose what to measure (like how much CPU is used)
Here's an example of scaling based on CPU use:
| CPU Use | Action |
|---|---|
| High | Add more containers |
| Low | Remove containers |
Auto Scaling for RDS and DynamoDB
RDS and DynamoDB use Auto Scaling to manage database size. This helps your database work well when it's busy or quiet.
To use Auto Scaling with RDS or DynamoDB:
- Go to the AWS Console and find Auto Scaling
- Make a new Auto Scaling group for your database
- Set up rules for when to make the database bigger or smaller
- Choose what to measure (like how much CPU is used)
Here's an example of scaling for RDS:
| CPU Use | Action |
|---|---|
| High | Add more database power |
| Low | Reduce database power |
For DynamoDB, you can scale read and write capacity:
| Table Use | Action |
|---|---|
| Busy | Add more read/write capacity |
| Quiet | Reduce read/write capacity |
Wrap-up
Main points to remember
AWS Auto Scaling helps manage cloud resources. Here are key things to keep in mind:
- Pick the right scaling plan for your app
- Find important measures and limits for good auto-scaling
- Use both dynamic and predictive scaling for best results
- Use Auto Scaling with other AWS tools like Elastic Load Balancing and CloudWatch
Following these tips helps keep your AWS resources ready and working well, even when workloads change.
What's next for Auto Scaling
AWS keeps improving, so Auto Scaling will likely get better too. Here are some possible future updates:
| Area | Possible Improvements |
|---|---|
| Predictive scaling | Better guessing of future needs |
| Working with other AWS tools | Easier use with Lambda and SageMaker |
| Special cases | Support for things like IoT devices |
It's good to stay up-to-date with new Auto Scaling features. This helps keep your apps and resources running well.
FAQs
How to configure Auto Scaling?
Setting up Auto Scaling in AWS involves these steps:
1. Log into AWS
- Go to the AWS Management Console
- New users may get free EC2 use (with limits)
2. Make a Launch Template
- Go to EC2 Console > Launch Templates
- Set up:
- Template name
- Amazon Machine Image (AMI)
- Instance types
- Security group (virtual firewall)
3. Set up Auto Scaling Group (ASG)
- Use the Auto Scaling wizard
- Choose:
- ASG name
- Size
- Network
4. Add Load Balancer (if needed)
- Helps spread out traffic
- Set up Elastic Load Balancing (ELB)
- Connect ELB to your ASG
5. Set Scaling Rules (if needed)
- Decide when to add or remove instances
Here's a quick look at the steps:
| Step | What to Do |
|---|---|
| 1 | Log into AWS |
| 2 | Make Launch Template |
| 3 | Set up ASG |
| 4 | Add Load Balancer (optional) |
| 5 | Set Scaling Rules (optional) |
These steps help you set up Auto Scaling to manage your AWS resources as needed.